Note
Go to the end to download the full example code
Analyzing Meshseries Data#
Section author: Florian Zill (Helmholtz Centre for Environmental Research GmbH - UFZ)
In this example we show how to aggregate data in a model over all timesteps as well as plot differences between to timesteps. For this purpose we use a component transport example from the ogs benchmark gallery (https://www.opengeosys.org/docs/benchmarks/hydro-component/elder/).
To see this benchmark results over all timesteps have a look at How to create Animations.
from ogstools.meshlib import difference
from ogstools.meshplotlib import examples, plot, setup
from ogstools.propertylib import Scalar

setup.reset()
mesh_series = examples.meshseries_CT_2D
si = Scalar(
    data_name="Si", data_unit="", output_unit="%", output_name="Saturation"
)
To read your own data as a mesh series you can do:
from ogstools.meshlib import MeshSeries
mesh_series = MeshSeries("filepath/filename_pvd_or_xdmf")
You can also use a property from the available presets instead of needing to create your own: Property Presets
You aggregate the data in MeshSeries over all timesteps given some
aggregation function, e.g. “min”, “max”, “var”
(see: aggregate()).
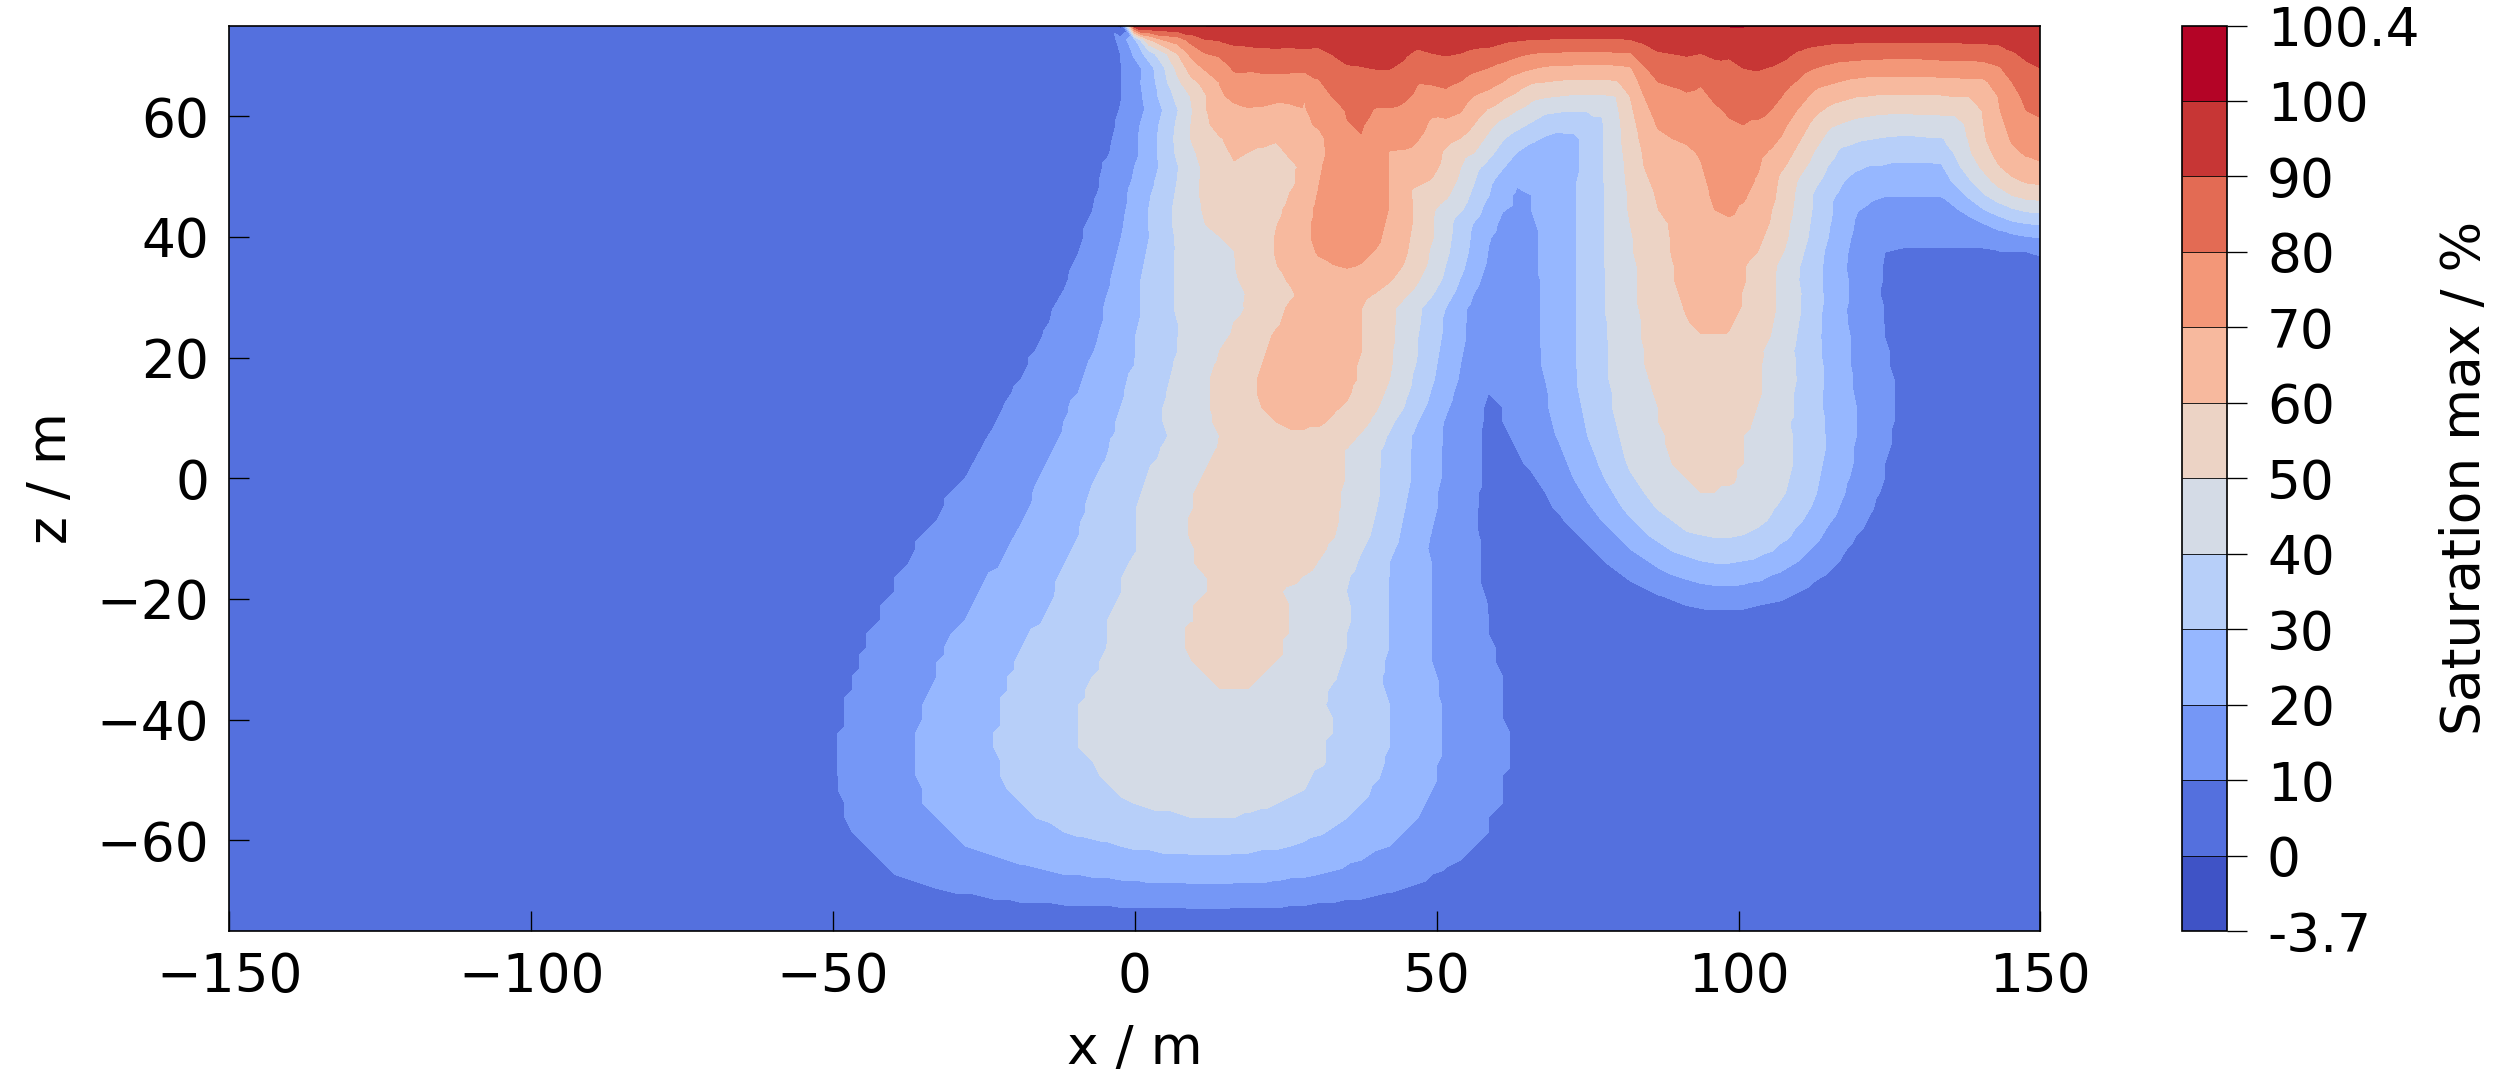
The following code gets the maximum saturation for each point in the mesh over
all timesteps and plots it. Note: the aggragation function returns the
resulting mesh and a new property corresponding to the aggregated data, to
ensure no duplicate unit conversion or data transformation is happening in the
plot function.
mesh = mesh_series.aggregate(si, "max")
fig = plot(mesh, si)

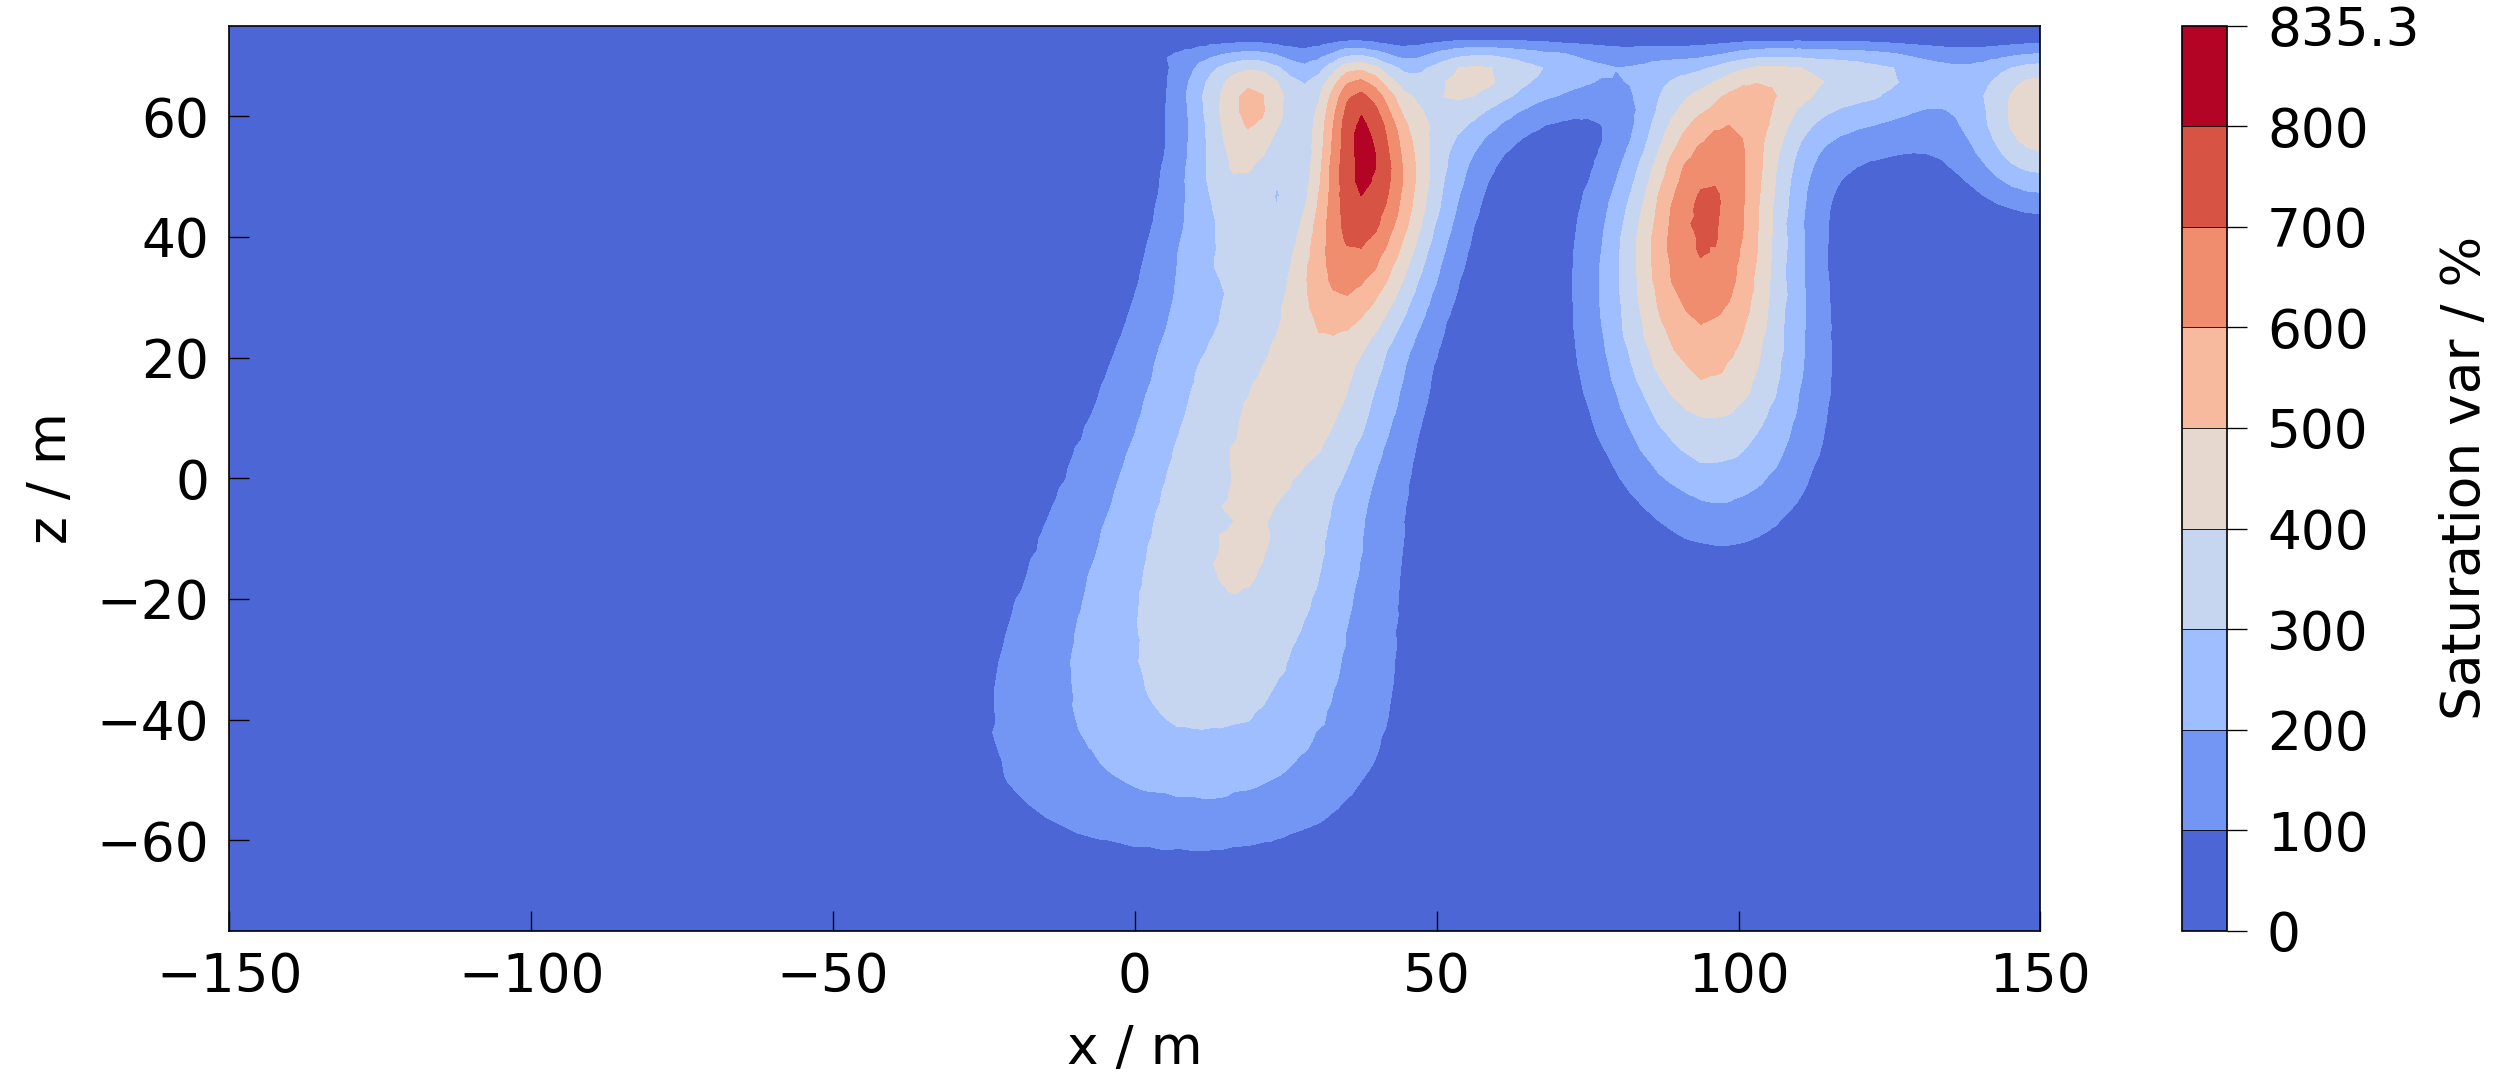
Likewise we can calculate and visualize the variance of the saturation:
mesh = mesh_series.aggregate(si, "var")
fig = plot(mesh, si)

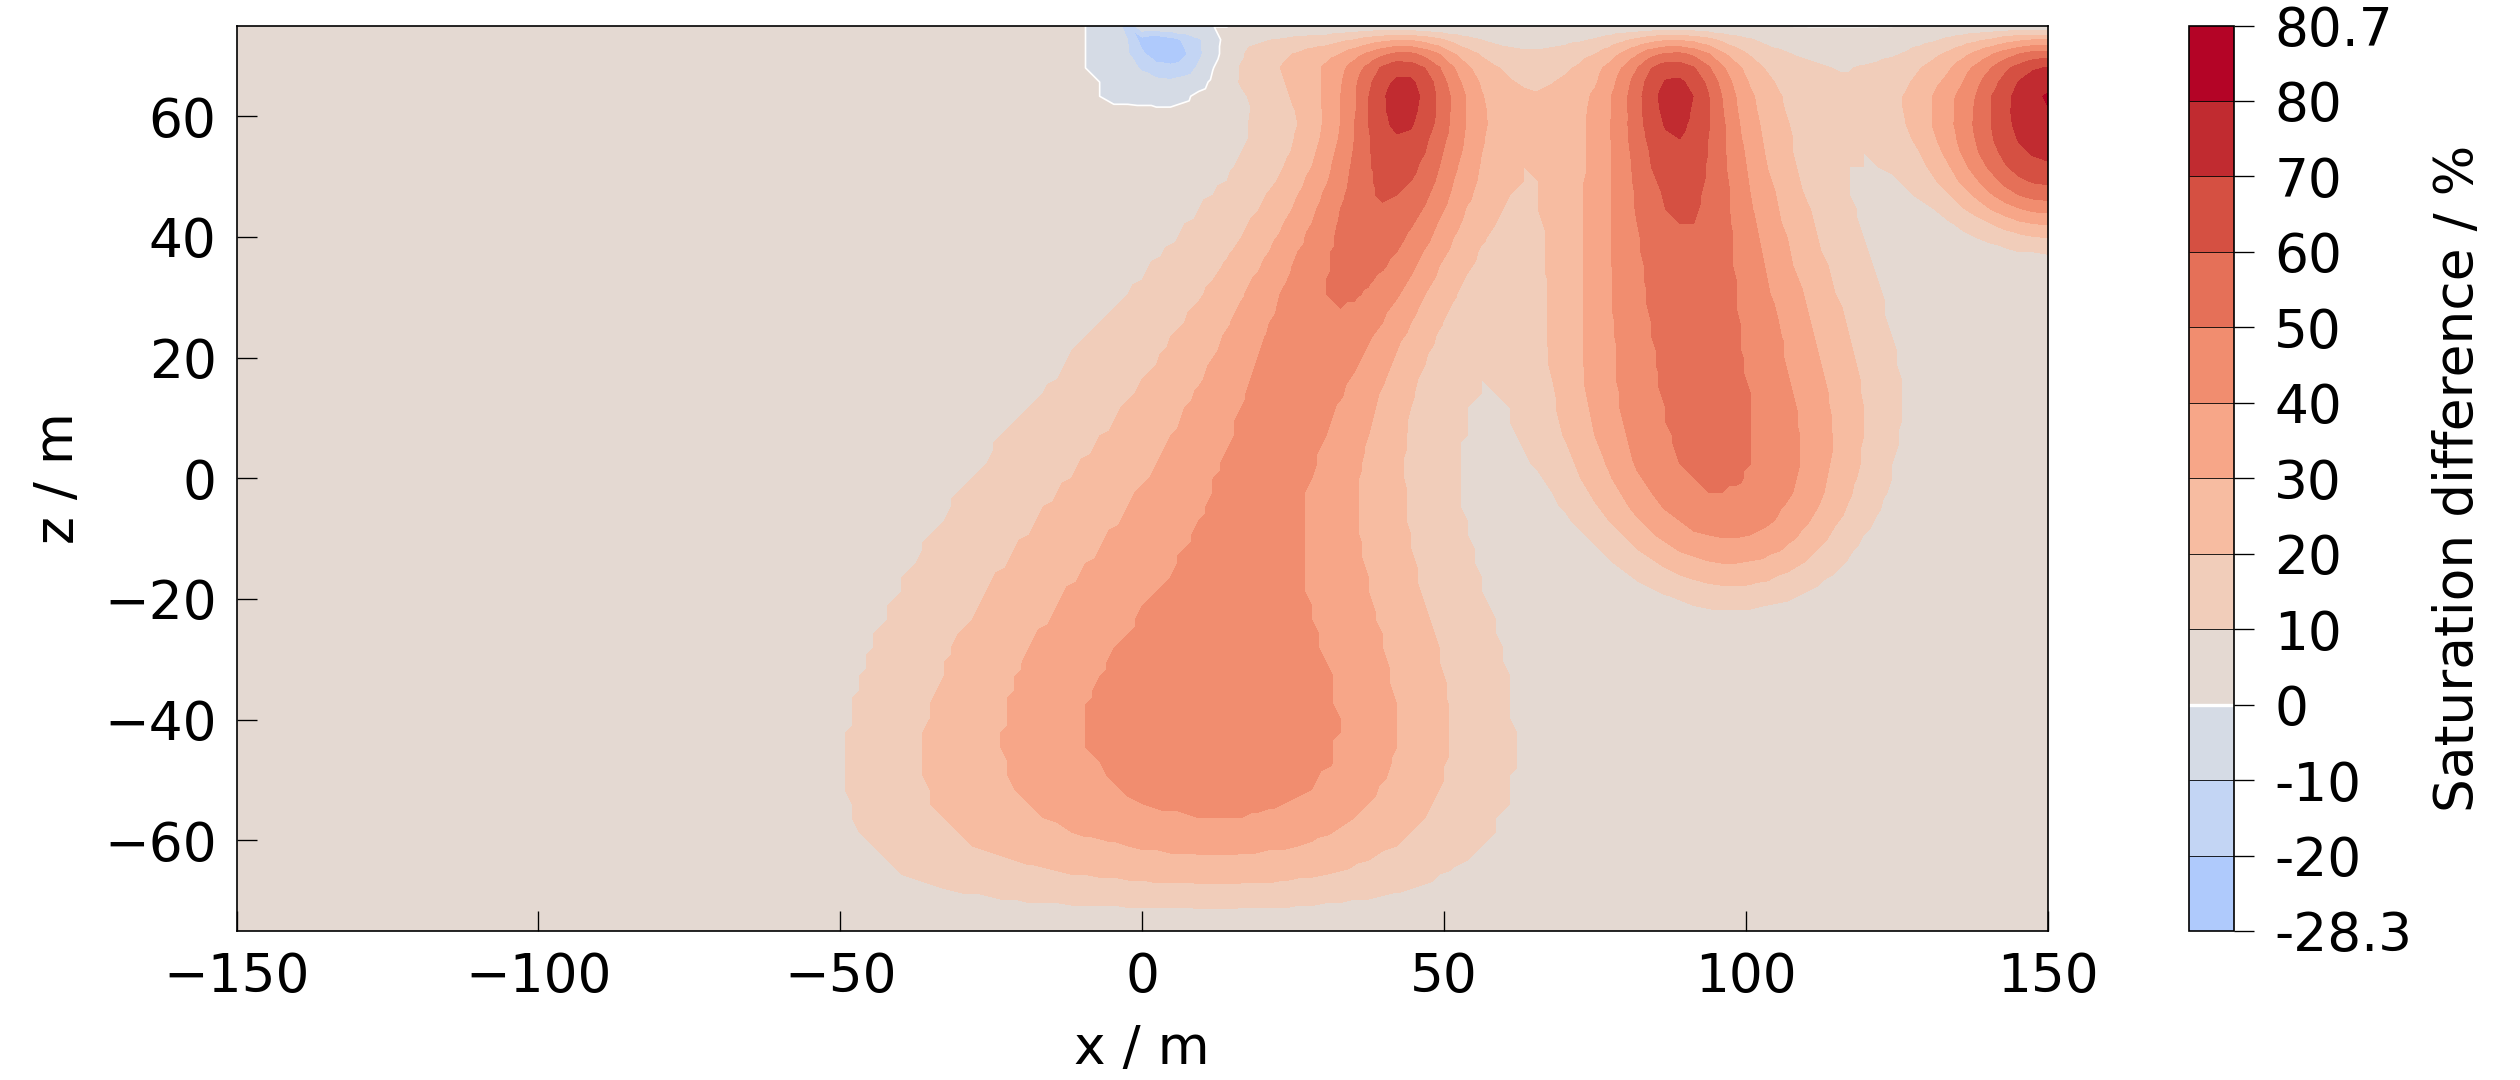
Difference between the last and the first timestep:
mesh = difference(mesh_series.read(-1), mesh_series.read(0), si)
fig = plot(mesh, si)

Total running time of the script: (0 minutes 1.138 seconds)
