

Note
Go to the end to download the full example code or to run this example in your browser via Binder.
Run a simulation#
OGSTools is a Python library designed to simplify the process of running
simulations with the OpenGeoSys (OGS) framework. The Project class is a core
component of OGSTools, providing a convenient interface for creating and
altering OGS6 input files up and executing OGS simulations. This allows you to
automate OGS-workflows in Python via Jupyter or just plain Python scripts.
The development of this functionality was first started in
[ogs6py](joergbuchwald/ogs6py) and is continued in OGSTools.
Here you’ll find the detailed API: ogstools.ogs6py.project.Project.
Features: - alternate existing files (e.g., for parameter sweeps) - create new input files from scratch - execute project files - tailored alteration of input files e.g. for mesh replacements or restarts - display and export parameter settings
In this guide, we will walk you through the process of using the Project class and then run a simple simulation from an existing model setup. Assuming you have prepared a model with your mesh and a project file you can use the following setup, to run it from python.
Choosing the OGS binary
Execution details (which OGS binary to use, MPI settings, logging, …) are
controlled via ogstools.core.execution.Execution. Pre-built OGS
binaries and container images for each release are available at
https://www.opengeosys.org/6.5.7/releases/.
To apply site-wide defaults on a shared system (e.g. HPC cluster), set the
OGS_EXECUTION_DEFAULTS environment variable to a YAML file that overrides
only the keys you need:
export OGS_EXECUTION_DEFAULTS=/path/to/my_defaults.yaml
See ogstools.core.execution.Execution for the full list of options.
import ogstools as ot

model = ot.Model(ot.definitions.EXAMPLES_DIR / "prj" / "simple_mechanics.prj")
sim = model.run()
# Optionally save the simulation data
sim.save()
assert sim.status == ot.Simulation.Status.done
print(sim)
Simulation id: 20260903_083745_687453
   Simulation(saved to: file:///tmp/ogstools_root/Simulation/20260903_083745_687453)
  Model: saved to file:///tmp/ogstools_root/Model/20260903_083745_508837
  Result: saved to file:///tmp/ogstools_root/Result/20260903_083745_594900
  Log file: file:///tmp/ogstools_root/Result/20260903_083745_594900/log.txt
  MeshSeries: file:///tmp/ogstools_root/Result/20260903_083745_594900/out_E=3.pvd
  Status: completed successfully (results available)
Manipulating the Project#
By using a prj-file as a template and modifying it in python we have an easy way to parametrize simulations. Below are some methods, which change different parts of the model definition. For more detailed information have a look into the API. The subsequent code would work but for clarity we recommend saving 2 different states of the prj object into 2 different files.
# Either tell that you are going to change prj object (prj.copy) OR do prj.save() after you have changed but before you run the simulation.
prj2 = model.project.copy()
prj2.replace_parameter_value(name="E", value=1e9)
# You can achieve the same via the `replace_text` method:
prj2.replace_text(1e9, xpath="./parameters/parameter[name='E']/value")
# Let's also replace the output prefix of the result
prj2.replace_text("E=1e9", xpath="./time_loop/output/prefix")
# The density of a phase can also be changed
prj2.replace_phase_property_value(
    mediumid=0, phase="Solid", name="density", value="42"
)
After modifying the Project you can execute the model in the same way as before. You have to prj.save(new_name) here, or beforehand by prj2.copy.
model2 = ot.Model(prj2, meshes=model.meshes)
sim2 = model2.run()
print(sim2)
assert sim2.status == ot.Simulation.Status.done
assert sim2.meshseries != sim.meshseries
Simulation id: 20260903_083745_866702
   (not saved (planned: file:///tmp/ogstools_root/Simulation/20260903_083745_866702))
  Model: saved to file:///tmp/ogstools_root/Model/20260903_083745_690805
  Result: saved to file:///tmp/ogstools_root/Result/20260903_083745_774148
  Log file: file:///tmp/ogstools_root/Result/20260903_083745_774148/log.txt
  MeshSeries: file:///tmp/ogstools_root/Result/20260903_083745_774148/E=1e9.pvd
  Status: completed successfully (results available)
Alternatively, this call is not blocking:
simc_a = model2.controller()
simc_b = model2.controller()  # As an example: Fire up a second simulation
# simc_a.terminate() aborts a simulation early, if needed
sim_a, sim_b = (
    simc_a.run(),
    simc_b.run(),
)  # Both run concurrently, here we wait for both to finish
Monitoring a running simulation#
controller() starts the simulation but does not block, so you can watch
its progress live while it runs. plot_log() opens the same interactive
Bokeh dashboard as the ogsmonitor command line tool, in a real browser tab
simc = model2.controller()
dashboard = simc.plot_log(
    log_data=[["step_start_time", "step_size"], ["iteration_number", "dx_x_0"]],
    notebook=False,
)
plot_log() also accepts a notebook flag: with notebook=True the
plot is embedded directly in the notebook cell’s output instead.
Warning
In VS Code’s Jupyter extension, notebook=True does not live-update:
this is an unresolved upstream limitation
(bokeh/jupyter_bokeh#199),
not something ogstools can work around.
For that reason, notebook=False (default) is
recommended, including in VS Code. A dashboard opens in a real browser tab.
You need to switch to that tab to see the live charts (see screenshot
below).
Here we wait for the simulation to finish and then close the dashboard, so building these docs doesn’t leave a dashboard process running.
simc.run()
# simc.terminate() stops the simulation *and* closes any dashboards opened
# from it. The returned `dashboard`
# additionally supports its own .terminate() (notebook=False only) to close
# just the browser tab while leaving the simulation running.
simc.terminate()
Requested termination - but the Simulation is already finished.

True
Note
Equivalently, from a separate terminal:
ogsmonitor /path/to/log.txt
See the monitor user guide for more details.
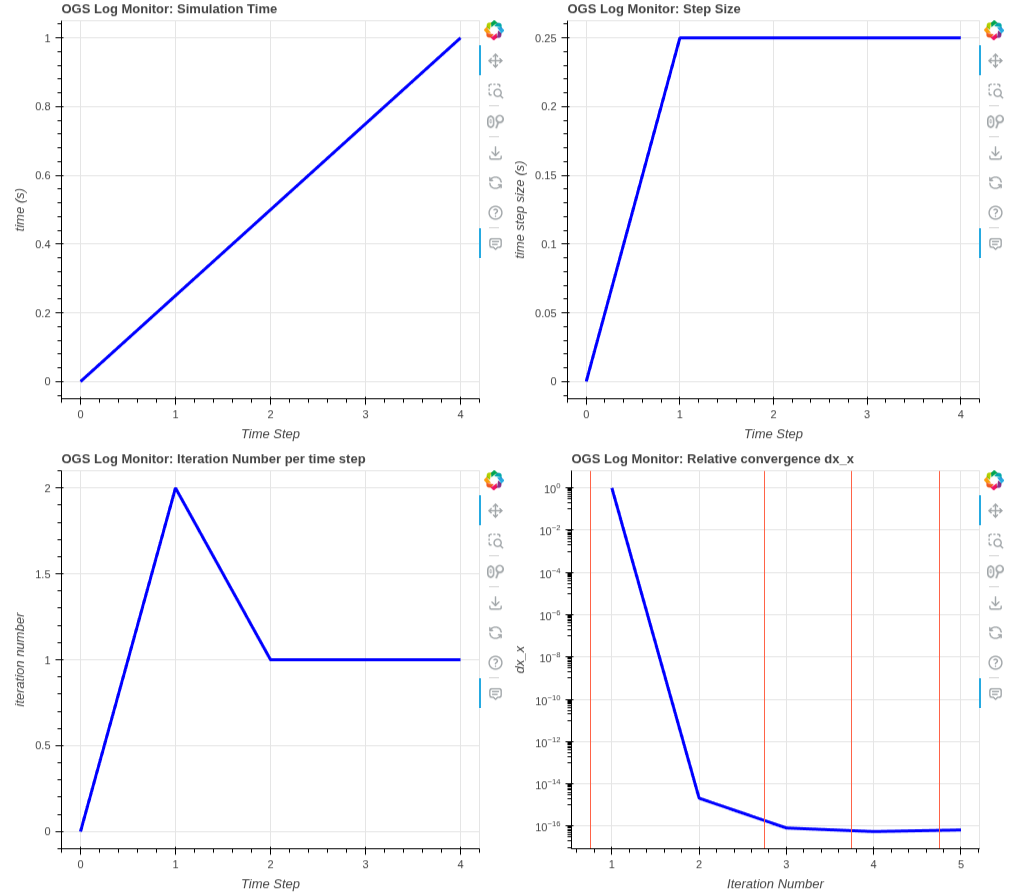
Screenshot of the interactive Bokeh dashboard opened by plot_log()
or ogsmonitor.#
Creating a Project from scratch#
You can also create a Project without a prj-file. Have a look at this example to see how: How to Create Simple Mechanics Problem
Total running time of the script: (0 minutes 0.570 seconds)
